Introduction to Bidet Buttons
The bidet nozzle plays a crucial role in enhancing personal hygiene. A bidet button controls the nozzle’s functions, including water pressure and temperature. Over time, these buttons may wear out or become unresponsive. When this happens, users may struggle to operate the bidet effectively. Replacing the bidet button can significantly improve the overall usage experience. This guide will provide detailed steps for replacing the bidet button. By following these steps, you can ensure that your bidet nozzle operates smoothly and efficiently.
Identifying Button Issues
Recognizing issues with the bidet button is essential for timely replacements. Common signs include buttons sticking or failing to respond. If the button feels loose or does not click properly, it may be time for a replacement. Additionally, water may not flow correctly if the button is malfunctioning. Regularly check the button’s functionality to ensure optimal performance. If you notice any of these issues, consider replacing the button promptly. Timely action can prevent further complications and ensure that your bidet nozzle functions as intended.
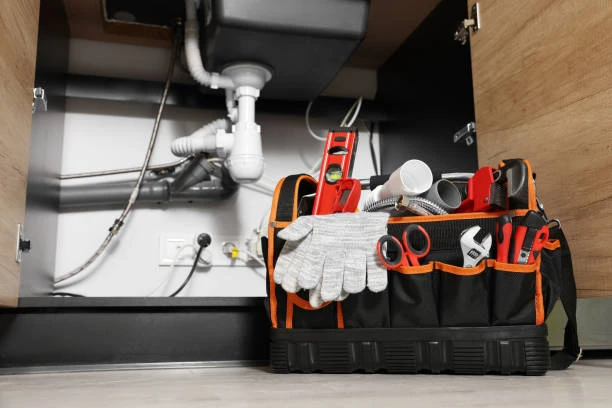
Tools and Materials Needed
Before starting the replacement process, gather all necessary tools and materials. You will need a small screwdriver, a replacement button, and possibly a towel. The screwdriver helps you remove the cover and access the button. A towel is useful for catching any water that may spill during the process. Make sure to purchase a button compatible with your specific bidet model. Check the manufacturer’s guidelines for correct specifications. Having all tools and materials ready streamlines the replacement process and minimizes interruptions.
Turning Off the Water Supply
Before replacing the bidet button, turn off the water supply to the bidet. Locate the shut-off valve, usually found near the toilet or under the sink. Turning off the water prevents unexpected leaks during the replacement. After shutting off the valve, flush the toilet to drain any remaining water. This action helps minimize spills when you work on the bidet. Keep a towel handy to catch any drips. Taking these precautions keeps your workspace clean and dry during the replacement process.
Removing the Old Button
Now it’s time to remove the old bidet button. Start by locating the cover that protects the button mechanism. Use the screwdriver to carefully unscrew and remove this cover. Once you expose the button, disconnect any wiring if necessary. Be cautious not to damage any surrounding components during this process. After removing the button, inspect the area for any debris or buildup. Cleaning this area ensures a proper fit for the new button. Properly removing the old button sets the stage for a successful installation of the new one.
Installing the New Button
After removing the old button, it’s time to install the new one. Begin by positioning the new button in place, ensuring it aligns with the existing connections. If the button requires wiring, connect it securely to the appropriate terminals. Push the button firmly to ensure it seats correctly in its housing. Once the button is in place, reattach the cover using the screws you previously removed. Be careful not to overtighten the screws, as this can cause damage. This careful installation guarantees that your bidet nozzle functions efficiently and effectively.
Restoring the Water Supply and Testing
Once you finish installing the new button, restore the water supply. Turn the shut-off valve counterclockwise to allow water back into the system. After restoring the water supply, check for any leaks around the connections. If you notice any leaks, turn off the water and tighten the fittings as necessary. Once you confirm there are no leaks, test the bidet functionality. Press the new button and check the water flow and pressure. This testing verifies that the new button works correctly and enhances your overall experience.
Regular Maintenance Tips
To ensure the longevity of your bidet nozzle and button, perform regular maintenance. Inspect the button periodically for signs of wear or damage. Keep the area around the button clean to prevent buildup. If you experience issues, consult the user manual for troubleshooting tips. Consider replacing the button every few years, depending on usage. Following these maintenance tips helps prevent issues before they arise. A well-maintained bidet nozzle and button enhance your overall bathroom experience and promote better hygiene.
IFAN Products international standards
IFAN products strictly adhere to a comprehensive range of international standards, encompassing ISO 15874, EN 15874, ASTM F2389, DIN 8077/8078, GB/T 18742, NBR 15884, ISO 15494, EN ISO 15494, GB/T 19472, NBR 15494, ASTM 2846 (501), DIN 8079/8080 (502), ASTM F441/F441M SCH80 (503), DIN (504), DIN (505), GB/T 18993, AS/NZS 1477, CSA B137.6, NSF/ANSI 14, TIS 17-2532/1131-2535, BS 3505, BS 4346 (801), ASTM D1785 SCH40 (802), ASTM D1785 SCH80 (803), DIN (804), GB (805), GB (806), GB(901), DWV(902), ASTM D2665 (903), along with ASTM D2241, D2665, D2729, and F441/F441M series, ISO 1452, EN ISO 1452, DIN 8061/8062, GB/T 10002, AS/NZS 1477, JIS K6741, CSA B137.3, and other national and industry norms.
Connect
IFAN is a Chinese manufacturer of plastic pipes, fittings and valves with 30 years of experience. If you are interest in IFAN copper fittings, copper valves, plastic pipes and fittings, please contact us. IFAN offers you a variety of standard pipes to meet your specific needs. Click below to learn more about IFAN’s wide range of affordable and cost-effective valve products and piping system related products.
We will reply your email or fax within 24 hours.
You can call us at any time if there is any question on our production.
For more information,pls visit our webside https://waterpipefitting.com/
Pls Mailto: [email protected]
Whatsapp: +86 15088288323
Recent Comments